


MIDI Controller article
Midi Controller for Beginners: A Complete Guide
Getting your first MIDI controller feels bigger than it needs to be. Here's how to get playing today, without reading every spec sheet on the internet.

Getting your first MIDI controller feels like a bigger decision than it actually needs to be. There's a lot of jargon flying around, and half of it doesn't matter yet. Let's cut through it and get you playing something today, not in three weeks once you've read every spec sheet on the internet.
The One Thing You Need to Understand First
A MIDI controller doesn't make any sound by itself. That trips up almost everyone the first time. You plug it in, press a key, and hear nothing — because it's not an instrument in the traditional sense, it's a way of controlling one. It sends information (which note, how hard, for how long) to software running on your computer, and that software is what actually produces the sound you hear. Once you've made that connection once, everything else clicks much faster.
Don't Overthink the First Purchase
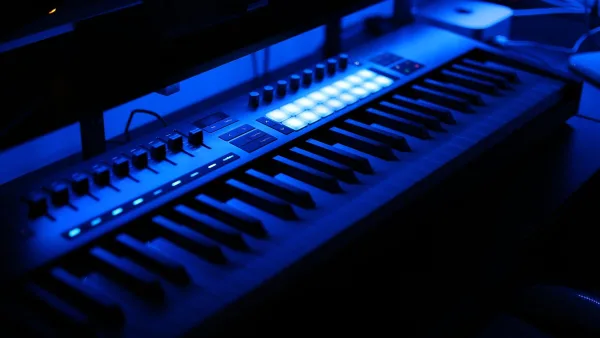
You genuinely don't need 61 keys, weighted action, sixteen pads and MPE support for your first go. A small, simple keyboard controller, 25 or 32 keys, is plenty for learning how everything fits together, working out chord shapes, and getting comfortable with your software. You can always upgrade once you actually know what you're missing. Buying big and fancy on day one, before you know your own workflow, is one of the most common and most avoidable beginner mistakes.
Your First Ten Minutes
Here's roughly what plugging in for the first time looks like:
- Connect the controller to your computer, usually with a simple USB cable
- Open your chosen software (a DAW like Ableton Live, Logic Pro or FL Studio, or a simpler instrument app)
- Create or open an instrument track
- Select your controller as the MIDI input for that track
- Press a key and listen — if nothing happens, check the input is actually selected before you panic
It sounds fiddly written out, but it's genuinely a five-minute job once you've done it once. Every controller and DAW pairing behaves slightly differently, so don't worry if your first attempt takes a bit of trial and error.
Learning the Basic Vocabulary
A few words will keep popping up, and it's worth knowing them early rather than nodding along confused:
| Term | What It Means |
|---|---|
| Velocity | How hard you struck the key or pad, usually affecting volume or tone |
| Aftertouch | Pressure applied after the note is already held down |
| MIDI channel | A numbered lane your data travels on, useful once you're running multiple instruments |
| Mapping | Telling software which physical knob or key controls which parameter |
You don't need to master all of this on day one. Just recognising the words when you hit them in a tutorial will save you a lot of confused re-reading.
Common Early Wobbles
A few things catch nearly everyone out early on. Forgetting to select the right MIDI input on a new track is probably the single most common "why isn't this working" moment, so check that first, always. Assuming a bigger, feature-packed controller will somehow teach you faster is another one — it won't, and it can actually be more overwhelming to learn on. And don't panic if your pads or keys feel unresponsive at first; sometimes it's simply a velocity curve setting in the software rather than anything wrong with the hardware.
Do You Need Music Theory First?
Not to get started, no. Plenty of people learn a MIDI controller and basic music theory side by side, picking up scales and chord shapes as they go rather than studying them in isolation first. If a chord doesn't sound right, most software will let you drag notes around after the fact, so early mistakes are genuinely low-stakes here in a way they aren't with a live acoustic recording. Give yourself permission to experiment.
Building a Habit, Not Just a Setup
The technical side of a MIDI controller is honestly the easy part; showing up regularly is the bit that actually moves you forward. Ten focused minutes most days will teach you far more than one long, frustrated session every few weeks. Keep your setup ready to go — controller plugged in, project open — so there's no friction between deciding to practise and actually starting.
Where to Go From Here
Once the basics feel comfortable, our ultimate guide fills in the wider picture at a more relaxed pace, and our complete buyer's guide and round-up by price tier are there when you're ready to think about upgrading. Our list of common mistakes to avoid is worth a calm read too, just so nothing catches you off guard later.
The Bottom Line
Every producer you admire started exactly where you are now, pressing a key and wondering why nothing happened. Keep it simple, get comfortable with the basics, and let your actual workflow tell you what to upgrade later, rather than guessing upfront.



Comments