
Akai Mpk Mini article
Akai Mpk Mini for Beginners: A Complete Guide
The one idea that unlocks everything about a MIDI controller, plus a patient, step-by-step first setup.
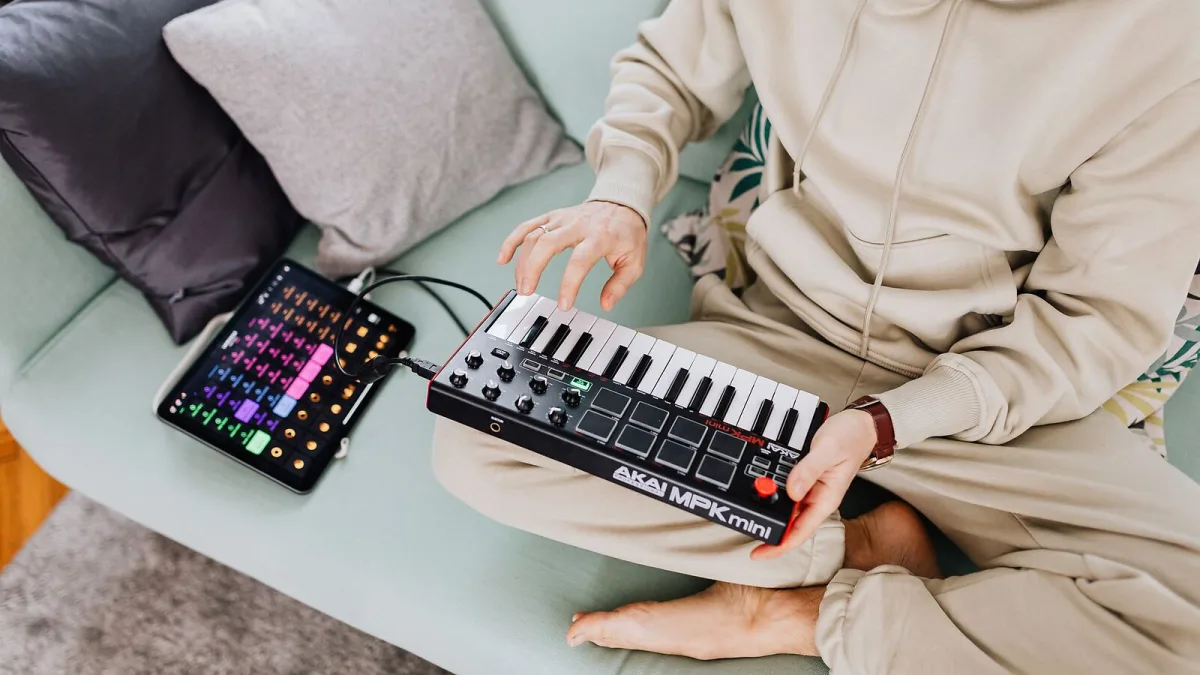
Welcome in — if you've never touched a MIDI controller before, there are a couple of ideas worth getting straight before you even plug anything in. Once those click, the rest genuinely falls into place quickly. Let's take it step by step, no rushing.
The One Idea That Unlocks Everything
An Akai MPK Mini doesn't make any sound by itself. That surprises a lot of first-timers, so it's worth saying plainly: pressing a key sends information to your computer, telling it which note was played and how firmly. The actual sound comes from software running on that computer — a virtual instrument, a sampler, a drum machine app. Once that idea settles, everything else about how the controller works starts making sense.
What You'll Need Before You Start With an Akai MPK Mini
- The controller itself and its USB cable.
- A computer with a free USB port.
- A little patience for your very first setup session, which always takes longest.
Setting It Up for the First Time
- Connect it to your computer with the USB cable. It draws its power through this same cable, so there's nothing else to plug in.
- Register the device using the serial number printed on the unit, through the manufacturer's website.
- Install the official software manager, which handles downloading everything else you're entitled to.
- Install the included production software and instrument sounds through that same manager.
- Open your chosen music software and find its MIDI or audio preferences. This is usually tucked into a settings or preferences menu.
- Select the controller as a MIDI input device. Once selected, pressing a key should trigger whatever sound is currently loaded.
If nothing happens on that first key press, don't panic — double-check the correct input has actually been selected in your software, and confirm a sound-producing instrument or preset is actually loaded and ready to receive it.
Understanding the Pads and Knobs, Gently
The eight pads work brilliantly for drum sounds and samples, and they respond to how hard you hit them, just like the keys respond to how hard they're pressed. The eight knobs don't have one fixed job — what each one controls depends entirely on your software's current setup, so don't worry if they seem to do nothing useful at first. That's completely normal until you've assigned them to something.
A Few Reassurances for Total Beginners
- The keys are smaller than a real piano's. That's intentional, not a fault, and it's genuinely fine for the kind of parts most beginners start with.
- You don't need to understand every knob immediately. Learn one function properly before adding the next.
- Silence on your first attempt is common, not a sign you've done anything wrong. MIDI setup has a few small steps, and missing one is easy to fix once you know where to look.
Getting Comfortable Before You Explore Further
It's tempting to want to sound like a finished producer within the first hour, and that's simply not how learning any new instrument works, MIDI controller included. Give yourself permission to spend a whole first week just pressing keys and listening, without judging the results against anything you've heard online.
Your First Real Session
Once sound is flowing, resist the urge to explore every feature at once. Spend your first proper session just playing notes with one simple instrument sound loaded, getting a feel for how hard you need to press for different volumes. Everything else — pads, knobs, the arpeggiator — can wait for session two.
Where to Go Next
Once the basics feel comfortable, this complete guide covers everything on the controller in proper depth, and if you're thinking about your very first purchase rather than one you already own, this buyer's guide is worth reading before you commit to a specific version.
The Bottom Line
Nobody understands every knob on their Akai MPK Mini on their first afternoon, and nobody needs to. Get a single note sounding, get comfortable with that, and build outward from there one small step at a time — that's genuinely all a confident start requires.



Comments