


Instruments Tambourine guide
How to Set Up and Use Instruments Tambourine
Grip, angle, mounting and sound check — a practical, step-by-step walkthrough for getting a tambourine set up and sounding right.
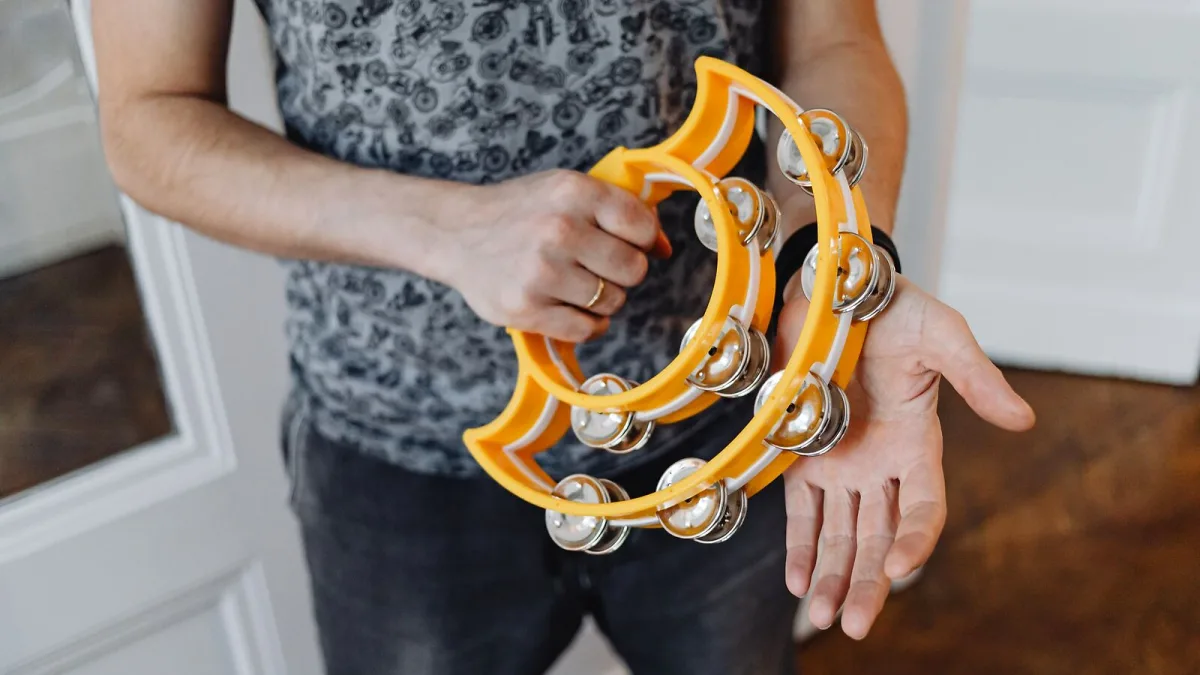
A tambourine looks simple enough that most people never bother setting it up properly, and that's exactly why so many of them sound thin, clattery or inconsistent from one hit to the next. Treat it like any other piece of kit — check it, hold it correctly, and know what each stroke is doing — and it becomes a genuinely controllable instrument. Here's how I'd talk a band through it before soundcheck.
What You'll Need
- Your tambourine (handheld or a mountable model)
- A mounting bracket or stand clamp, if you're fixing it to a kit or hardware
- A quiet room to check it in before you're under stage or studio pressure
Setting Up Your Tambourine, Step by Step
- Inspect it first. Check every jingle moves freely in its slot, the shell has no cracks, and — on a headed model — the head is evenly tensioned with no soft spots.
- Decide handheld or mounted. If you're playing it directly, you'll hold it in your non-dominant hand. If it's going on a stand or drum-kit hardware, fit the bracket now, before you start working on technique.
- Find your grip. Support the lower edge of the shell where your fingers meet your palm. Wrap your fingers around the frame without pressing on the jingles hard enough to stop them moving.
- Set the angle. Tilt the tambourine to roughly 45 degrees. This keeps the jingles hanging naturally and stops them clattering against each other when you're not playing.
- Loosen your wrist. Let your wrist lead the movement rather than your whole arm. A tense grip and a stiff wrist are the two most common causes of a harsh, uncontrolled sound.
- Run a quiet check. Give it a soft shake, a single strike, and a light thumb roll before you play at full volume. This tells you whether the instrument itself needs adjusting before you start blaming your technique.
Basic Strokes, Once You're Set Up
With the grip and angle sorted, these are the core strokes worth having under your hands:
- Shake: a controlled wrist motion that keeps the jingles moving continuously.
- Strike the head: fingertips or fingers together for a moderate hit; loose knuckles for a harder accent.
- Strike the rim: a sharper, more percussive sound with less resonance than hitting the head.
- Thumb roll: rub your thumb around the head or near the rim to produce a sustained roll; this only works reliably on a headed model.
- Knee strike: tap the frame against your leg for a distinct accented sound, common in folk and live performance.
Mounting It for Kit or Live Use
If you're adding it to a drum kit, a hi-hat clamp or a dedicated bracket lets you play it hands-free alongside a stick or brush. Check the bracket is snug — a loose mount will buzz or rattle into the rest of the kit and ruin exactly the sound you're trying to add. For a vocalist playing tambourine on stage, keep the instrument angled away from the vocal mic; the jingle frequencies sit right where they'll bleed straight into a vocal channel.
Getting a Clean Sound Check
From behind a desk, a tambourine is deceptively easy to get wrong. It lives in a sensitive part of the upper midrange and treble, so a small level change reads as a big change in how harsh it feels. A few habits that help:
- Have the player run a normal pattern at performance volume, not a single polite shake, before you set levels.
- Position any microphone slightly off-axis if the transients are too sharp and spiky.
- Aim toward the jingles for brightness, or more toward the head and shell for body, on a headed instrument.
- Use gentle compression if needed, but watch it — heavy compression exaggerates sustain and any room noise.
Troubleshooting Common Setup Problems
| Problem | Likely cause | Fix |
|---|---|---|
| Jingles rattle when not being played | Angle too flat, or grip too tight | Tilt closer to 45 degrees; loosen the grip slightly |
| Sound is harsh or brittle | Tense wrist, or striking too close to the rim | Relax the wrist; strike nearer the centre of the head |
| Thumb roll won't sustain | Head too dry, or instrument is headless | Add a little moisture for a headed model; a headless model can't thumb roll at all |
| Mounted tambourine buzzes on the kit | Loose bracket or clamp | Tighten the mount and re-check for contact with other hardware |
Looking After It Between Sessions
A tambourine that's properly set up won't stay that way if it's thrown in a gig bag with everything else. Store it somewhere dry and stable — damp conditions are particularly hard on natural skin heads and wooden shells. Before each session, give the jingle slots and any mounting hardware a quick check for looseness, and don't force a thumb roll on a head that feels dry or brittle; you'll damage it rather than get a better sound. If you're transporting a professional instrument regularly, a padded case is worth the small extra weight in your kit bag.
Once You're Comfortable
This setup routine covers the mechanics, but the instrument itself is worth understanding properly — our overview guide explains how a tambourine is actually built and why headed and headless models behave so differently. If you're still weighing up which one to buy, our buyer's guide covers that in detail, and our common mistakes guide is worth a look once the basics above feel second nature.





Comments