


Vinyl Record Player guide
How to Set Up and Use Vinyl Record Player
Ten minutes of proper setup now saves you a scratched record and a confused evening of no sound later. Here's exactly how it's done.

New vinyl record player out of the box and itching to hear it? Fair enough, but ten minutes of proper setup now saves you a scratched record and a confused evening of no sound later. Here's exactly how I get a new vinyl record player from box to first playback, step by step.
What You'll Need Before You Start
- A firm, level surface, away from speakers
- The turntable itself, plus counterweight, platter and belt if they arrived separately
- A record you don't mind using for the first test run
- Whatever you're connecting to: powered speakers, an amp, or a phono preamp and passive speakers
Setting Up Your Vinyl Record Player, Step by Step
- Find a firm, level surface. Keep it away from speakers and anything that vibrates — footsteps on a wobbly shelf are a classic cause of skipping.
- Fit the platter and belt, if your deck needs it. Belt-drive decks usually ship with the belt loose; loop it around the sub-platter and motor pulley as the manual shows, then set the platter on top.
- Attach the counterweight to the tonearm. Screw it on loosely for now — you'll fine-tune it in the next step.
- Balance the tonearm to zero. With the anti-skate dial set to zero, gently rotate the counterweight until the arm floats level, neither dropping nor rising on its own.
- Set the tracking force. Turn the calibrated dial on the counterweight to your cartridge manufacturer's recommended figure, without moving the counterweight itself.
- Set the anti-skate to match. Most manufacturers recommend matching it roughly to the tracking force; check your specific cartridge's instructions.
- Confirm the correct speed. Select 33⅓ or 45 RPM to match the record you're about to play.
- Connect the grounding wire, if fitted. This usually attaches to a screw terminal on your amplifier or preamp, and prevents an annoying hum.
- Choose the correct output setting. If your deck has a phono/line switch, set it to match where you've plugged in — line if it's going into a line-level input, phono if it's going into a dedicated phono input.
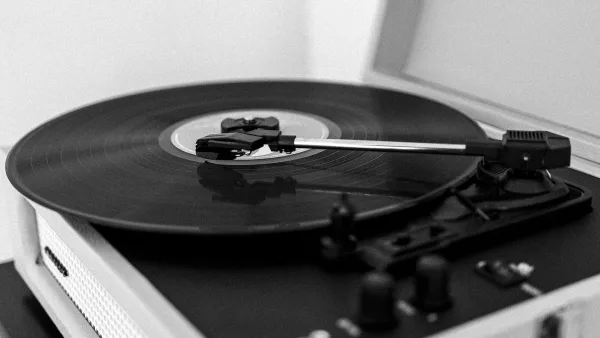
- Lower the stylus using the cueing lever. Never drop the tonearm by hand — let the cueing mechanism lower it gently onto the groove.
A Quick Word on Cartridge Alignment
Most decks arrive with the cartridge already fitted and roughly aligned by the manufacturer, so you don't strictly need to touch it on day one. If you ever swap cartridges yourself down the line, though, it's worth knowing that alignment (getting the stylus sitting at the correct angle and overhang across the record) affects tracking and wear just as much as tracking force does. For now, a factory-fitted cartridge on a new deck is generally safe to trust and get playing.
Connecting to Speakers or an Amplifier
If your vinyl record player has a built-in phono preamp, you can generally run it straight into powered speakers or any line-level input on an amp. No built-in preamp means the output must go into a dedicated phono input, or through a separate phono preamp first — plugging a phono-level signal straight into a line input gives you a whisper-quiet, thin sound, while the reverse can distort badly. If you're not sure which situation you're in, check the deck's specification before you start second-guessing your speakers.
Playing Your First Record
On your vinyl record player, give the record a quick brush with an anti-static brush before it goes anywhere near the platter — dust in the groove causes far more noise than people expect. Place it on the platter, start the motor, and use the cueing lever to lower the stylus onto the lead-in groove at the edge. Sit back and listen for a clean, quiet start with no obvious hum or crackle before you relax into the album properly.
Troubleshooting Your First Session
- Hum: usually a grounding issue — check the ground wire is connected and secure.
- Skipping: often the surface isn't level, or tracking force is set too light.
- Very quiet sound: check the phono/line switch matches your actual connection.
- Distorted, harsh sound: the reverse of the above, or tracking force set too heavy.
If you're still finding your feet with the format generally, our beginner's guide covers the wider basics, and it's well worth a look at common mistakes to avoid before you settle into a routine.
The Bottom Line
Ten careful minutes at setup — level surface, balanced tonearm, correct tracking force, right output setting — is the difference between years of trouble-free listening and a frustrating first week. Once it's dialled in properly, you genuinely won't think about any of this again for a long while.




Comments