


Piccolo Instrument guide
How to Set Up and Use Piccolo Instrument
Assembling a piccolo, finding the embouchure, and getting a genuinely clean first sound, one patient step at a time.
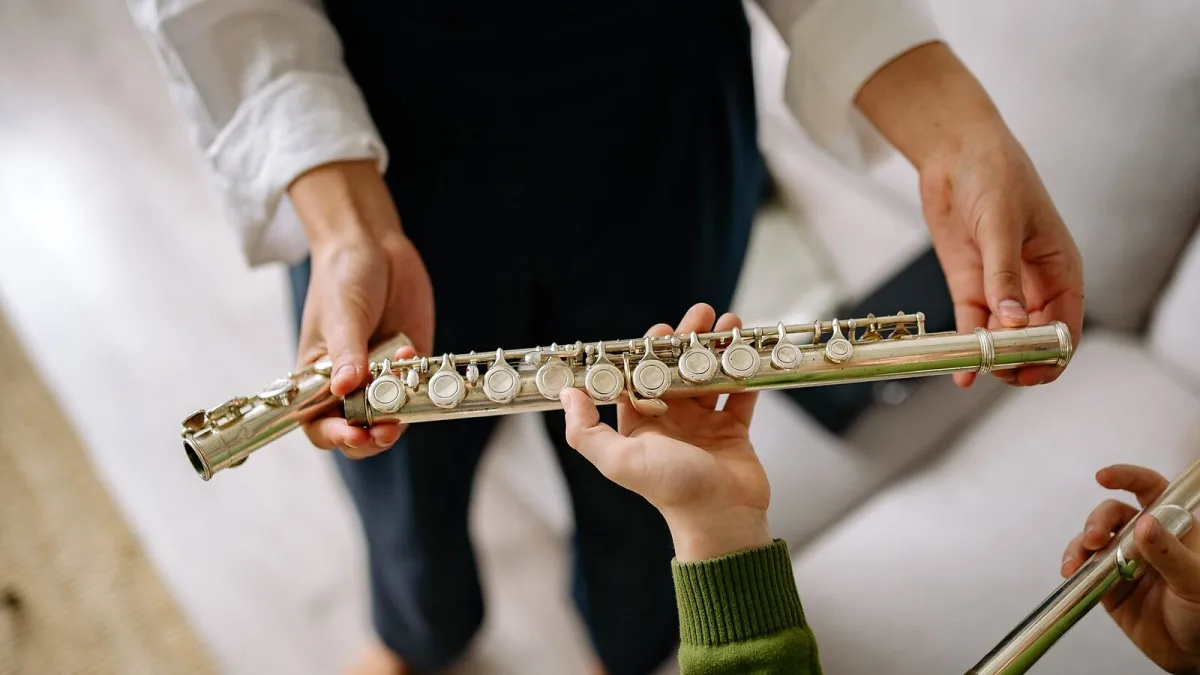
There's a particular quiet satisfaction in getting a clean note out of a piccolo for the first time — it's a smaller, fussier instrument than the flute most players come to a piccolo from, and it rewards patience more than force. Here's a proper, unhurried walk-through of setting one up and coaxing out that first proper sound, the way I'd talk a friend through it over a cup of tea.
What You'll Want Within Reach
Before you start, gather your piccolo, its cleaning rod and swab, and a soft cloth. A tuner or tuning app is genuinely useful even at this early stage, though not strictly essential for your very first attempts. There's no footjoint to worry about, unlike the flute — most instruments come apart into just two pieces, a headjoint and a body, which makes this part refreshingly simple.
Setting Up Your Piccolo and Getting Your First Sound
- Assemble the piccolo's headjoint and body. Line up the embouchure hole on the headjoint with the row of keys on the body, and gently twist the two sections together until they meet with a small, even resistance.
- Check the joint moves smoothly, never forced. If it feels stiff or grinds, stop and have the cork or joint checked by a technician rather than twisting harder, especially on a wooden instrument.
- Find your embouchure. Rest the lip plate against your lower lip, slightly higher than you might on a flute, and bring your lips gently together to leave a small, focused opening in the centre.
- Produce your first sound. Direct a fast, narrow stream of air across the embouchure hole rather than into it, aiming roughly half onto the far edge. Expect some breathy, unfocused early attempts — that's completely normal.
- Settle your hand position and posture. Keep your shoulders relaxed and your right elbow away from your body, supporting the instrument lightly with your fingers rather than gripping it.
- Check your tuning on a comfortable middle note. Play a note you can hold steadily, ideally around the centre of the range, and compare it against a tuner or piano before making any embouchure adjustments.
- Swab it out and pack it away properly. Run the cleaning rod and swab through both sections to remove moisture, then return the instrument to its case rather than leaving it out on a stand or bed.
Why the Piccolo Embouchure Feels So Different at First
A piccolo wants a smaller, more concentrated air stream than a flute, and the lip aperture needs to be noticeably tighter without tensing into a pinch. Pinching the lips is a genuinely common early mistake, and it tends to produce a thin, shrill tone rather than the focused sound you're after. If your jaw or lips feel tense after a few minutes on the piccolo, that's usually the sign to stop, relax, and try again rather than pushing through.
If Your Piccolo Isn't Making a Sound Yet
- No sound at all: Check the headjoint alignment first, then try directing the air stream slightly lower or higher across the hole in small increments.
- A breathy, airy tone: Narrow the aperture slightly and increase air speed rather than air volume — a faster, thinner stream usually helps more than blowing harder.
- A sharp, shrill sound: This is very often a pinched embouchure. Consciously relax your lips and jaw and try again with a gentler starting attempt.
- Tiring quickly: Short, frequent sessions genuinely beat one long, exhausting one while your embouchure muscles are still developing.
None of these hiccups mean you're doing something fundamentally wrong — a piccolo genuinely is fussier to get going than most instruments, and every player who now sounds effortless worked through exactly this stage.
Building the Habit From Here
Once a first sound is reliably there, keep sessions short and consistent rather than long and occasional. Long tones on the piccolo at a comfortable volume, held steadily and checked against a tuner, are the single most useful early practice you can do. If you're wondering whether this instrument was even the right place to start, or how the whole learning journey tends to unfold, this beginner's guide covers that side of things properly, and this complete introduction is worth a read for the fuller background on how the instrument actually works.
The Bottom Line
Setting up a piccolo and using it for the first time is mostly a matter of patience: assemble it gently, find a small and relaxed embouchure, and expect the first honest sounds to be rough around the edges. Every player who sounds effortless on the piccolo now started exactly where you're starting today.





Comments