


Piano with Labels article
Common Piano with Labels Mistakes to Avoid
The same handful of slips come up again and again with labelled keyboards, myself included the first time round. Here's the honest list, and easy fixes.

Over the years I've watched plenty of well-meaning parents make the same handful of slips setting up a piano with labels, myself included with my own children the first time round. None of them are serious, and every one is easy to put right once you know what to look for. Here's the honest list.
Mistake 1: Labelling every key when landmarks would teach faster
It feels generous to mark absolutely everything, but for a learner who already has a little confidence, covering every single key can actually slow down the moment they start reading the keyboard's own pattern. Labelling just the Cs and Fs often gets a child working out the notes in between far sooner than a fully labelled keyboard does.
Mistake 2: Choosing a non-removable product out of habit
This is the one I'd never let slide. Always check that a label set is explicitly described as removable before it goes anywhere near a real instrument, and never reach for permanent marker on piano keys without a technician's say-so. A little checking here saves a lot of regret later.
Mistake 3: Placing labels where fingers actually strike
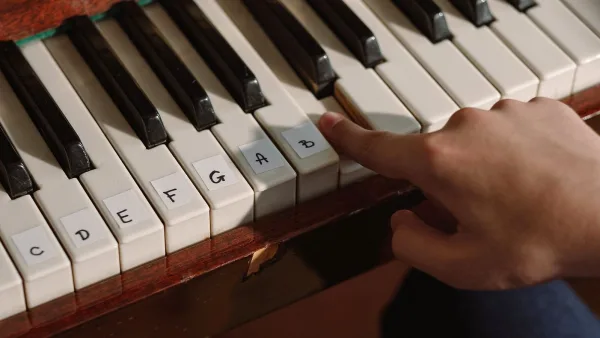
Stick a label in the exact spot a finger presses down, and it will lift within days, however good the adhesive. Placing labels just below the front edge of each key, away from the main striking area, keeps them in place for weeks rather than days.
Mistake 4: Never taking the labels away
This is probably the most common slip of all. Labels are wonderful for those first few weeks, but a child who's still reading stickers six months in hasn't been given the chance to actually learn the keyboard. Build in a plan from the start to remove labels gradually, note by note, as each one becomes familiar.
Mistake 5: Removing all the labels at once, out of frustration
The opposite mistake happens too — a parent decides labels have "gone on long enough" and strips the whole keyboard bare in one go. That sudden jump is genuinely discouraging for a child who was progressing steadily. A gradual removal, a few notes at a time, keeps confidence intact while still moving things forward.
Mistake 6: Skipping the black keys forever
It's sensible to leave the black keys until the white keys feel comfortable, but some families never circle back to them at all. Once note names are secure, a simple explanation of sharps and flats — the same key can be called either, depending on context — is a natural and welcome next step, not something to avoid indefinitely.
Mistake 7: Ignoring the wrong key count when buying
When buying a piano with labels, choosing a set designed for an 88-key piano to use on a 61-key keyboard, or the reverse, leaves gaps or forces overlap that confuses rather than helps. It only takes a moment to count the keys before ordering, and it prevents a genuinely annoying mismatch.
Mistake 8: Using strong solvents to remove stubborn residue
If a label leaves a little stickiness behind, reaching for a strong household cleaner can damage a piano key's finish, especially on an acoustic instrument. A barely damp, soft cloth handles most residue perfectly well; anything stronger is worth checking with a technician first.
A gentler way forward
None of these mistakes reflect badly on a parent or a learner — they're simply the common slips that come from doing something new for the first time. If you'd like to avoid them from the outset, our step-by-step setup guide walks through applying and removing labels properly, and our buyer's guide covers choosing the right set before you even begin. New to all this? Our beginner's guide is a kinder starting point.
The bottom line
A little care around these common slips is all it takes to get real value from a piano with labels: choose removable products, place them thoughtfully, and have a gentle plan for taking them away again. Get those three things right, and the rest tends to look after itself.




Comments