


Nt 1 Kit article
Nt 1 Kit for Beginners: A Complete Guide
Not sure what order to plug things in? Here's a calm, structured walkthrough of setting up your NT1 Kit for the first time.

Just unboxed your NT1 Kit and not quite sure what order to plug things in? That's completely normal, and there's no need to feel silly about asking. Let's go through it calmly, one step at a time, so your first recording sounds good rather than just loud.
What's in the NT1 Kit Box
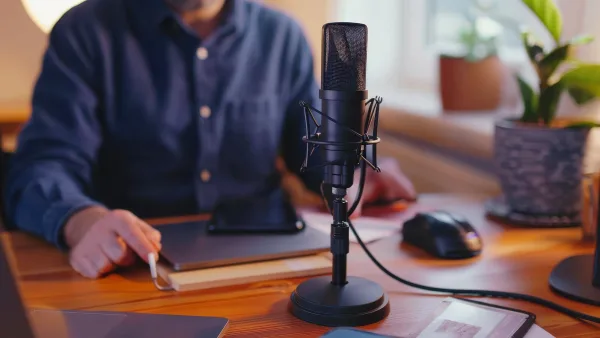
Before you start, lay everything out and check you have the microphone itself, the SM6 shock mount (the cradle-like suspension that holds the mic and isolates it from vibration), an integrated pop filter, an XLR cable and a dust cover. If any of these are missing, it's worth double-checking with wherever you bought it before you go any further.
Two Terms Worth Knowing First
Phantom power is a small electrical voltage — 24 or 48 volts — sent down the XLR cable from your audio interface to power the microphone's internal electronics. Without it, the NT1 simply won't produce any signal. Gain staging just means setting your interface's input level so a recording is loud enough to sound clear, without being so loud it distorts. Both of these matter more with this microphone than with a cheap USB mic, so it's worth getting comfortable with them early.
Setting Up Your NT1 Kit, Step by Step
- Attach the microphone to the shock mount. The SM6's elastic suspension should hold the mic securely without needing to be over-tightened.
- Mount the shock mount on a stand or boom arm. Position it at roughly mouth height when you're seated or standing in your normal recording position.
- Connect the XLR cable from the microphone to your audio interface or mixer, making sure the cable is fully seated at both ends.
- Turn phantom power on at your interface only after the cable is connected — switching it on and off with the mic already plugged in is normal, but connecting a live phantom-powered cable to a different device isn't a good habit to get into.
- Position the pop filter a few centimetres in front of the capsule, between your mouth and the microphone.
- Sit or stand roughly 15 to 30 centimetres from the pop filter as a starting distance, and plan to adjust from there by ear.
- Set your interface's input gain while speaking or singing at a normal performance volume, aiming for peaks that stay comfortably below clipping rather than right up against it.
That's genuinely the whole process. Once it's done once, plugging in for future sessions takes seconds.
Your First Test Recording
Record about thirty seconds of normal speech or singing, then play it back on headphones rather than speakers, where it's easier to catch problems. Listen specifically for popping on words starting with "p" or "b" (a sign the pop filter needs repositioning), any background hiss or hum (check your gain and your room), and harshness on "s" sounds, called sibilance, which usually means moving slightly off-axis from the capsule will help.
Common Early NT1 Kit Questions
- "Why is there no sound at all?" Nine times out of ten, this means phantom power isn't switched on, or the XLR cable isn't fully connected at one end.
- "Why does it sound distant and echoey?" You're likely picking up too much of the room. Move closer, or add some soft furnishings to the space behind and around you.
- "Why is there background hiss?" Because the NT1 is so quiet electronically, room noise and computer fans become more noticeable by comparison — check for both before assuming the microphone itself is at fault.
- "How do I know if my gain is set correctly?" Watch your interface's level meter while performing at real volume; if it's regularly hitting the very top and turning red, bring the gain down.
Building Good Habits Early
Keep your distance from the mic consistent through a take rather than swaying back and forth, since small position changes are easy to hear on a microphone this detailed. Record a few seconds of silence before you start talking, too — it gives you a reference of your room's actual noise floor if you ever need to clean up the recording later.
Where to Go Once You're Comfortable
Once setup feels routine, our explainer covers the different NT1 generations and full specifications in more depth, and if you're thinking about buying a second one or upgrading, both the buyer's guide and best-value picks are worth reading. And once you've had a few sessions under your belt, common mistakes to avoid is worth a read before habits set in.
The Bottom Line
Attach, mount, connect, power up, position, and set your gain — that's the whole setup, and every experienced home-studio owner started exactly where you are now. Take it slowly the first time, trust your ears over guesswork, and your NT1 Kit will give you a genuinely professional-sounding recording within your first session.




Comments