


24 Channel Mixer article
The Ultimate Guide to 24 Channel Mixer
A 24-channel mixer provides professional-grade input capacity and processing for live sound and recording. This guide covers architecture, signal flow and applications.

A 24-channel mixer is a powerful mixing console offering 24 independent input channels for audio routing, processing and blending. Whether managing small touring bands, house of worship productions, event reinforcement or multi-camera film sets, a 24-channel mixer provides the input capacity and processing flexibility needed for complex, professional audio environments. Understanding mixer architecture, channel strip functions, and signal flow fundamentals allows you to harness the full power of these essential live sound tools. This comprehensive guide covers 24-channel mixer capabilities, routing options and practical applications across performance and production contexts.
What Is a 24-Channel Mixer?
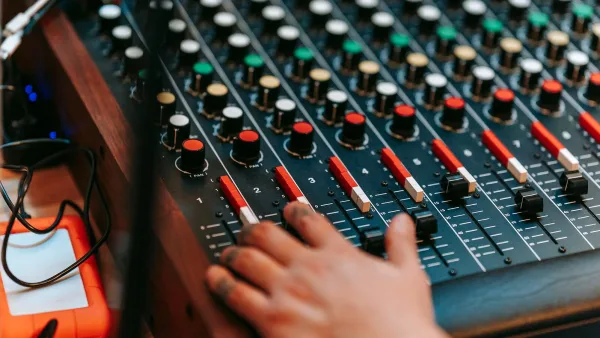
A mixing console consolidates multiple audio inputs (microphones, instruments, playback devices) into a coherent whole, allowing individual control over each source's level, EQ, effects processing and mix assignment. A 24-channel mixer handles 24 simultaneous input sources, each with independent processing and routing capabilities. Outputs typically include stereo main mix, monitor/cue mixes for performers, and individual subgroup faders for category-based control (drums, vocals, instruments).
Modern 24-channel mixers employ either analogue circuitry or digital signal processing (or hybrid approaches combining both). Analogue mixers offer classic sonic warmth and immediate tactile control; digital mixers provide advanced processing, recall capability and flexible routing. The choice depends on your application, budget and technical preferences.
Channel Strip Components
Each input channel on a 24-channel mixer includes:
- Input connectors — typically XLR microphone inputs plus line-level RCA or XLR for instruments and playback devices
- Preamp and gain staging — microphone preamplifier with controllable gain to set proper input level
- High-pass filter — removes low-frequency rumble and handling noise from microphones
- Mute button — silences channel input; useful for eliminating feedback or noise between performances
- Solo button — isolates channel input to monitor output for listening to single source
- Equaliser (EQ) — typically 3–4 band EQ for frequency shaping
- Fader — primary level control for blending channel into mix
- Pan control — routes channel left/right in stereo mix
- Sends/Auxiliaries — routes channel audio to effects processors (reverb, delay) or monitor mixes
- Metering — visual level indication for proper gain staging
Output Architecture
24-channel mixers employ several output categories:
Main Stereo Output
The primary mix combining all channels processed as a cohesive stereo signal. The main fader controls overall mix level to your PA system or recording interface. Most mixers include an output limiter protecting against accidental clipping.
Subgroup Outputs
Intermediate mix buses (typically 4–8) grouping related channels. Subgroups allow category-based control: drums grouped together, vocals together, instruments together. Adjusting a subgroup fader controls all channels in that group simultaneously, speeding workflow and maintaining balance.
Auxiliary/Effects Sends
Separate outputs routing to effects processors (reverb, delay, compression) for creative processing. Multiple auxiliary sends on each channel allow the same source to feed different effects at different levels.
Monitor/Cue Outputs
Dedicated stereo outputs for monitoring—performers' monitor wedge speakers on stage. A separate monitor mix allows performers to hear their own instruments prominently whilst receiving light backing material, entirely independent of front-of-house mix.
Analogue vs Digital 24-Channel Mixers
24-channel mixers come in two primary types:
Analogue Mixers
Traditional designs where audio signals flow through electronic circuits, transformed by operational amplifiers and passive components. Analogue mixers offer immediate, tactile control and are renowned for "warmth"—subtle saturation and harmonic colouration from the electronics themselves. Professional analogue consoles often become more desirable over time, with many studios and venues retaining decades-old consoles. Disadvantages include no recall (manually note fader positions for repeated events), limited built-in effects processing and larger physical footprint.
Digital Mixers
Audio converted to digital data, processed via computer algorithms, then converted back to analogue for output. Digital mixers offer extensive processing (EQ, compression, effects) built-in, scene recall (save and restore all settings instantly), flexible routing, and compact size. Disadvantages include learning curves (many menu systems) and the risk of technical failure more easily than analogue electronics. Many modern digital mixers employ motorised faders that physically move to show recalled settings, combining digital flexibility with tactile feedback.
Gain Structure and Signal Flow
Proper gain staging ensures optimal sound quality and maximum dynamic range:
- Set input gain so the loudest source peaks at approximately -12 to -6 dB on the input meter (leaving headroom for dynamic peaks).
- Route all channels to the main mix and adjust the main fader to a reference level (typically -6 to 0 dB at full scale).
- Blend individual channel faders starting low, gradually bringing each source into the mix to appropriate level.
- Use subgroup faders to maintain category balance (all vocals at consistent level relative to drums, etc.).
- Monitor both main mix and individual channels regularly using the solo function.
- Avoid pushing faders to maximum; keep peaks around -3 dB for headroom and flexibility.
Applications for 24-Channel Mixers
24-channel mixers serve numerous professional environments:
- Small-to-medium touring bands — provides enough inputs for full band plus backing playback
- House of worship productions — handles band, choir, soloists, playback and wireless microphones
- Corporate events and conferences — manages multiple microphones, wireless systems and playback devices
- Recording studios — groups microphones, instruments and effects within a single mixing environment
- Film and television production — manages multiple microphone sources on multi-camera shoots
- DJ and electronic music performance — often augmented with DJ equipment for expanded capabilities
- Theatrical productions — manages actor microphones, sound effects and musical accompaniment
Essential Controls and Features
Key mixer features to understand include:
- Phantom power — 48V electrical power supplied to condenser microphones through the XLR cable
- Pad/attenuator — reduces input level by 10–20 dB, preventing overload from hot microphones or instruments
- Insert points — allows inserting compressors or gates inline with channel processing
- Direct output — routes individual channels directly to recording interface, independent of main mix
- Talkback system — allows operator to communicate with performers on stage monitors
- Master control panel — central access to input sources, output routing and global settings
Troubleshooting Common Mixer Issues
Quickly resolve common problems:
- Feedback (high-pitched squeal) — reduce input gain, lower channel fader or use high-pass filter to remove low frequencies amplifying the loop
- No output or very quiet signal — check main fader position, verify cables are securely connected, confirm phantom power is on if using condensers
- Channels distorting — reduce input gain, check for clipped signal at subgroup level, ensure main fader has headroom
- Monitor mix inaudible — verify monitor send switch is engaged, check monitor output cable connection, confirm monitor amplifier is powered
- Missing channels — check channel mute button, verify fader is not at minimum, inspect input connector for damage
Conclusion
A 24-channel mixer is a powerful tool enabling professional-quality audio reinforcement, mixing and multi-source management across live performance and production environments. Understanding channel strip components, gain structure, signal flow and output routing allows you to extract maximum flexibility from your mixer. Whether mixing a touring band, managing a house of worship production or creating professional film audio, a properly-configured 24-channel mixer delivers the input capacity and processing control needed for complex, confident audio management. Invest time learning your specific mixer's capabilities thoroughly, and every subsequent production will benefit from faster, more professional mixing decisions.





Comments